








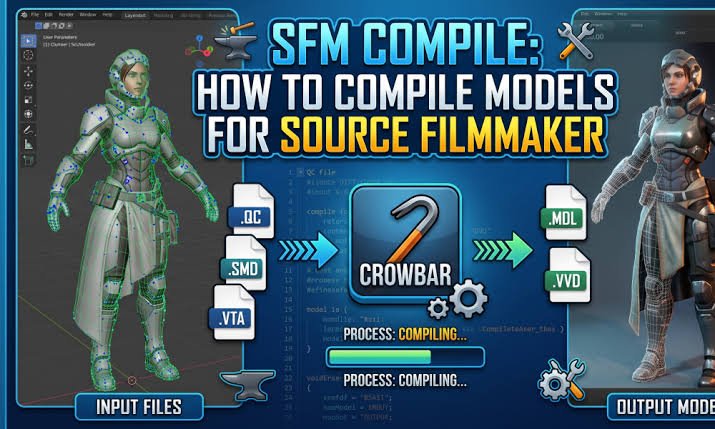
Importing custom 3D characters, props, or accessories into Source Filmmaker (SFM) requires a crucial step known as compiling. Because Source Filmmaker cannot read generic 3D asset files directly, compiling converts your raw meshes and textures into game-ready files that the Source Engine recognizes.
This guide covers everything you need to know about completing an SFM compile easily using graphic-interface tools.
What Does an SFM Compile Do?
When you perform an SFM compile, Valve’s internal engine compiler packages your 3D mesh, skeleton joints, materials, and physics data into dedicated model files.
Once compiled, the asset produces standard model files that live inside your SFM user directory, allowing the asset browser to load your model directly into your animation session.
Software You Need Before Compiling
To complete a smooth model compile, ensure you have the following software installed:
- Source Filmmaker: Installed through Steam.
- Crowbar: The most popular visual tool used to compile and manage Source Engine models easily without needing to type command-line prompt rules.
- 3D Software (e.g., Blender): Used to prepare and export your base 3D mesh.
- VTFEdit: A simple utility to convert image textures into Source-compatible material formats.
Step-by-Step Guide: How to Compile a Model for SFM
Step 1: Organize Your Asset Folders
Before running the compiler, organize your files into proper subfolders. Place your reference mesh files into a working source folder, and create target subfolders for your materials inside your SFM usermod directory. Keeping clean folder structures prevents missing texture errors later.
Step 2: Set Up Crowbar
- Launch Crowbar and click on the Compile tab.
- Click Setup Games and add Source Filmmaker to your game list.
- Point the executable path directly to the studiomdl.exe file located inside your Source Filmmaker installation folder.
Step 3: Run the Compile
- In Crowbar’s Compile tab, browse and select your model definition script.
- Set the target output option to place files into your SFM usermod directory.
- Click the Compile button.
- Watch the progress log in Crowbar until it displays a completion message.
How to Test Your Model in Source Filmmaker
- Launch Source Filmmaker and start a new session.
- Go to the Animation Set Editor on the left panel.
- Click the plus icon and choose Create Animation Set for New Model.
- Set the mod filter to usermod and type the name of your compiled model into the search box.
- Select your model and click Open to spawn it into your camera viewport.
Quick Fixes for Common Compilation Issues
- Black and Pink Checkerboard Textures: This means SFM cannot locate your material files. Verify that your texture files are placed in the exact material subfolder directory you specified before compiling.
- Model Appears Invisible: Ensure your 3D mesh was attached to a valid root bone or armature prior to exporting.
- Crowbar Cannot Find Compiler: Double-check your Crowbar settings to confirm the file path correctly points to the studiomdl.exe application inside SFM’s binary directory.
Final Thoughts
Compiling custom models for Source Filmmaker is a simple, repeatable process once your folder structures and Crowbar settings are configured. Using visual interface tools like Crowbar lets you skip manual command prompts and focus on bringing unique 3D assets directly into your animation projects.
Frequently Asked Questions (FAQs)
1. What is the easiest tool for compiling SFM models?
Crowbar is widely considered the easiest tool because it provides a clear user interface to compile models with a single click.
2. Where are compiled models saved in SFM?
By default, compiled models are output to the models subfolder within your Source Filmmaker usermod directory.
3. Why does my compiled model have missing textures?
Missing textures usually occur if your material files are placed in the wrong folder path or if the material names do not match your 3D model’s material assignments.





One comment on “SFM Compile Guide: How to Compile Models and Maps for Source Filmmaker”